Get Started with Alice 3 - Part 1 - Introduction
What is Alice 3?
Alice 3 is a free application that allows you to tell stories or create small games. You need to install it on your computer, there is no online version running in a webbrowser. Alice allows you to create 3D scenes and models (using characters licensed from Sims) that can be animated by scripts written with the help of a block-based visual programming language, or for the more advanced coder, using the JAVA programming language, Alice 3 is avaiable for Windows, macOS, and Linux computers.
On first sight, Alice looks similar to Scratch, but it goes far beyond. All Sims models have many joints that you can control to implement movements that resemble those of animated films (real walking, mouth movements, finger, …). Futhermore, Alice gives a good introduction into Object-oriented programming, this you can deepen later by swapping to JAVA code.
The posts in this series give you a first introduction into Alice, if you want to learn more or look for a different perspective, have a look at the free online ebook Alice 3 - How To Guide. The book is in PDF format, so you can download it and work with it even without Internet connection.
The best way go get to know Alice is by telling a short story yourself. There is a very comprehensive introduction to Alice 3 here for an Hour of Code activity, just have a look there, choose the materials you feel most comfortable with, and tell your story.
As an example, I have put below a short story I wrote with Alice. Telling stories with Alice, or creating a game is not only about dragging models on the scene and coding their interaction. You should always start with a plan, that’s a part of my own process described below.
So, get started, think about a short story and how you want it to appear in Alice, and then get it done with Alice. Enjoy!
Alice 3 - The Madhatter Welcomes his Audience
This post sketches how to plan and implement a basic clip with Alice 3.
Step 1: Plan your clip - An outline of what the clip will show
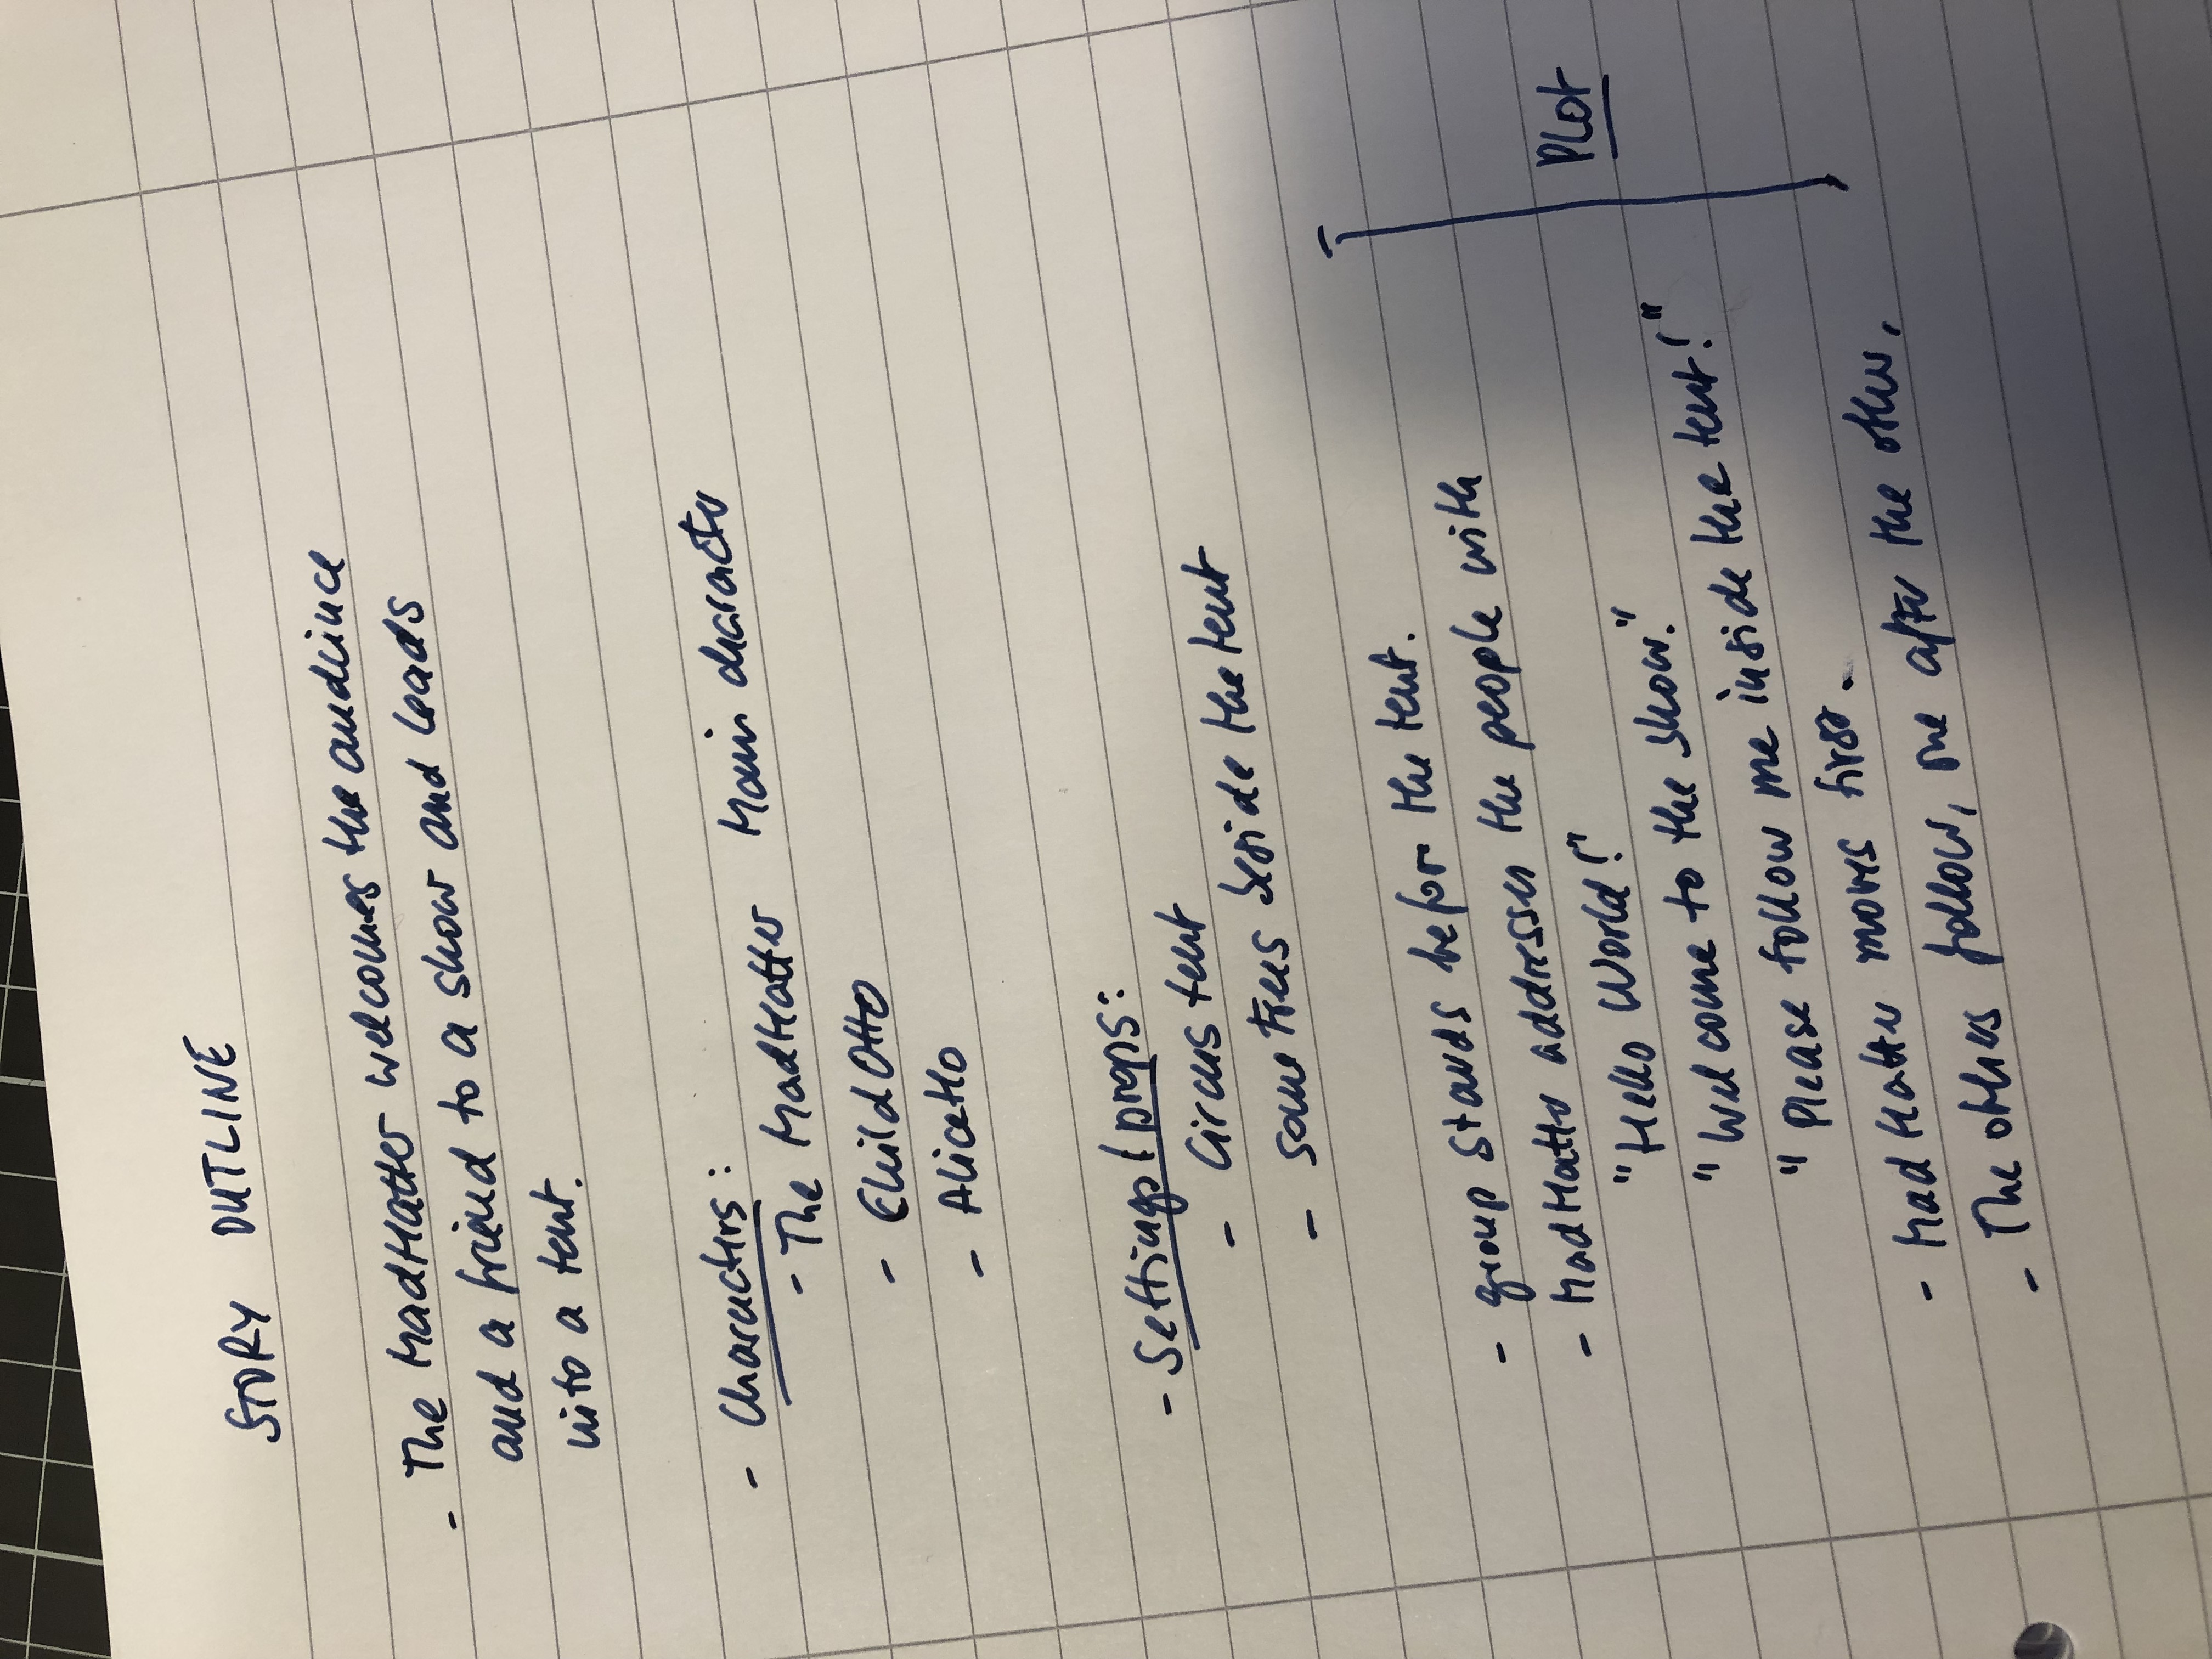
Step 2: Create the characters and position them on the screen

Step 3: Code the action

Step 4: Test the clip and adjust the properties and parameters till they fit
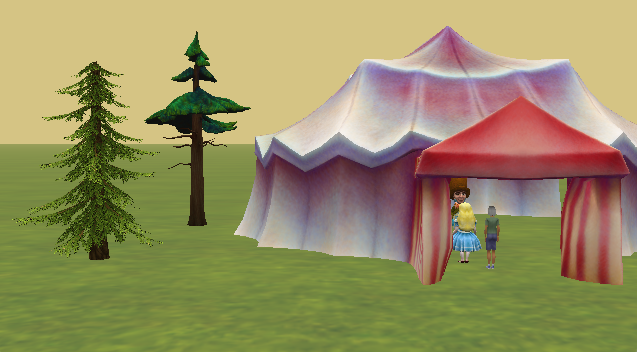
The final product
The link below brings you to the complete video clip, it is a still clip without sound.
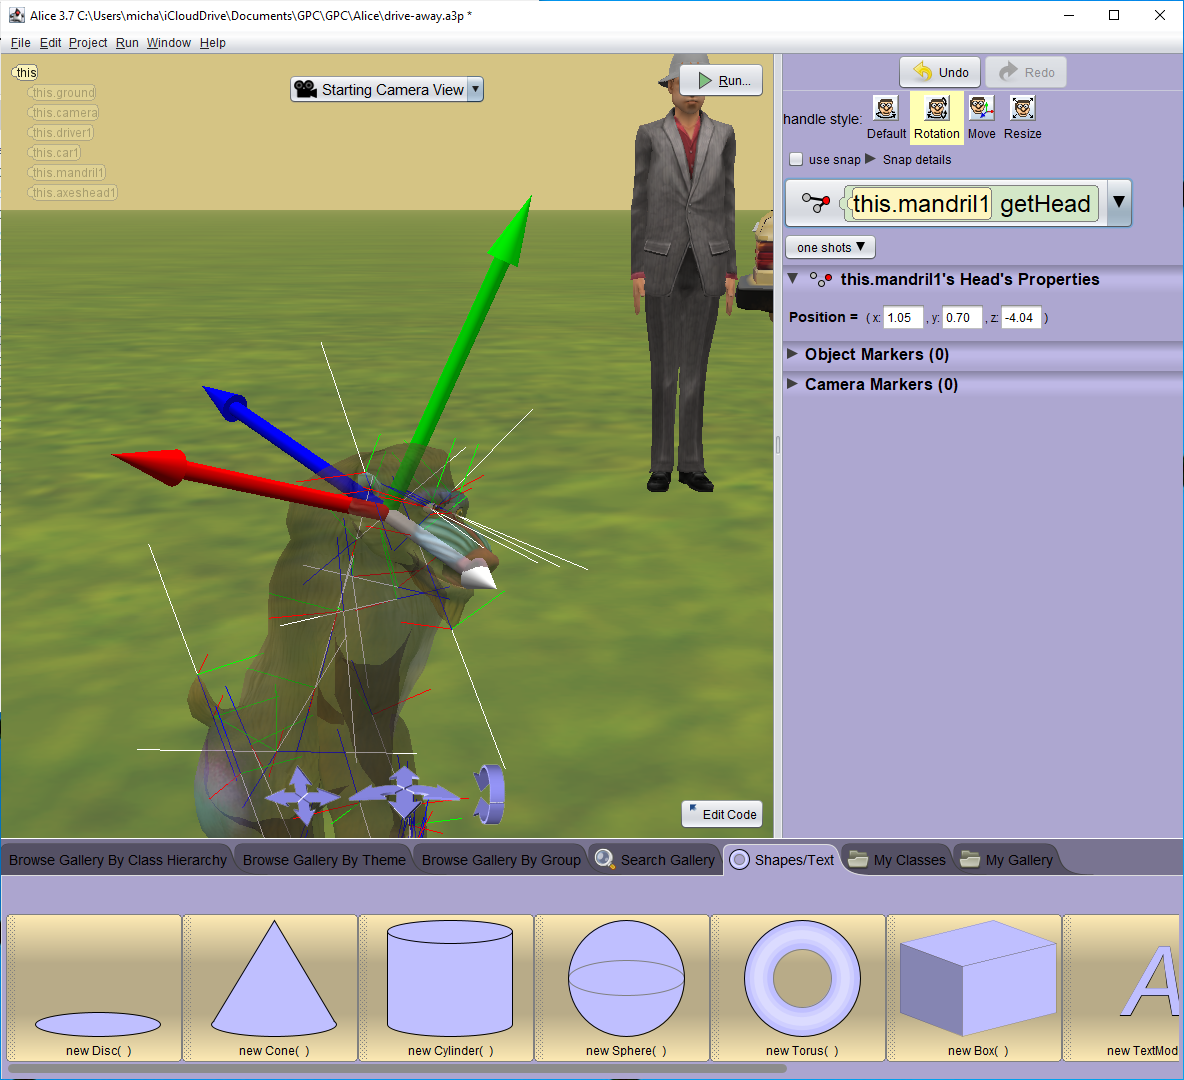
How to use the New Axes object to visualize sub-part / joint movements
When working with sub-parts, in particular for bipeds, you are faced with a lot of joints and it is difficult to find them and identify their orientation. The later you need to know in order to move, turn, and roll them.
A trick is to create an instance of the object type Axes and then link it to the joint you want to explore.
- Create a new axes object by clicking on New Axes() to call the constructor for an instance of this class.
- Go to the Object inspector on the right side and select with “Vehicule” the object or sub-part you want to attach the New Axes object.
- As an alternative to 2., you can also use the method moveAndORientTo in code or with one shots. But this axes instance will not follow the movements you apply to your joint.
- You are done, now the axes are attached to the joint, and you can easily predict how to do rolls, rotations and other movements. You may resize the axes before you start your trials. The one shots are the perfect tool to define the movements and see immediately what happens.
- Don’t forget to record your movements, so that you can later easily code them in the Code editor.
)