Get Started with Alice 3 - Part 2 - Camera and Object Markers, Code Your Own Procedures, Add Sound
Learning Objectives
The focus in this session is on
- getting a better grip on how to move sub-parts and
- using object and camera markers.
The Tiger in the Desert
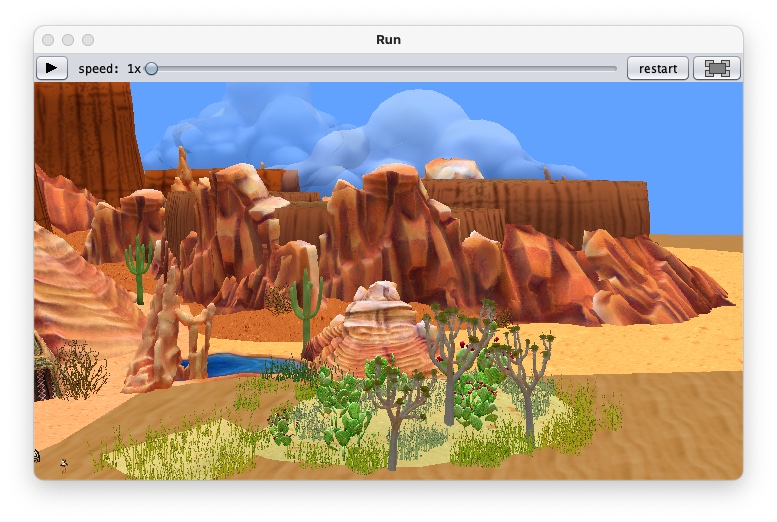
This video shows you a simple example on how you can use these features.
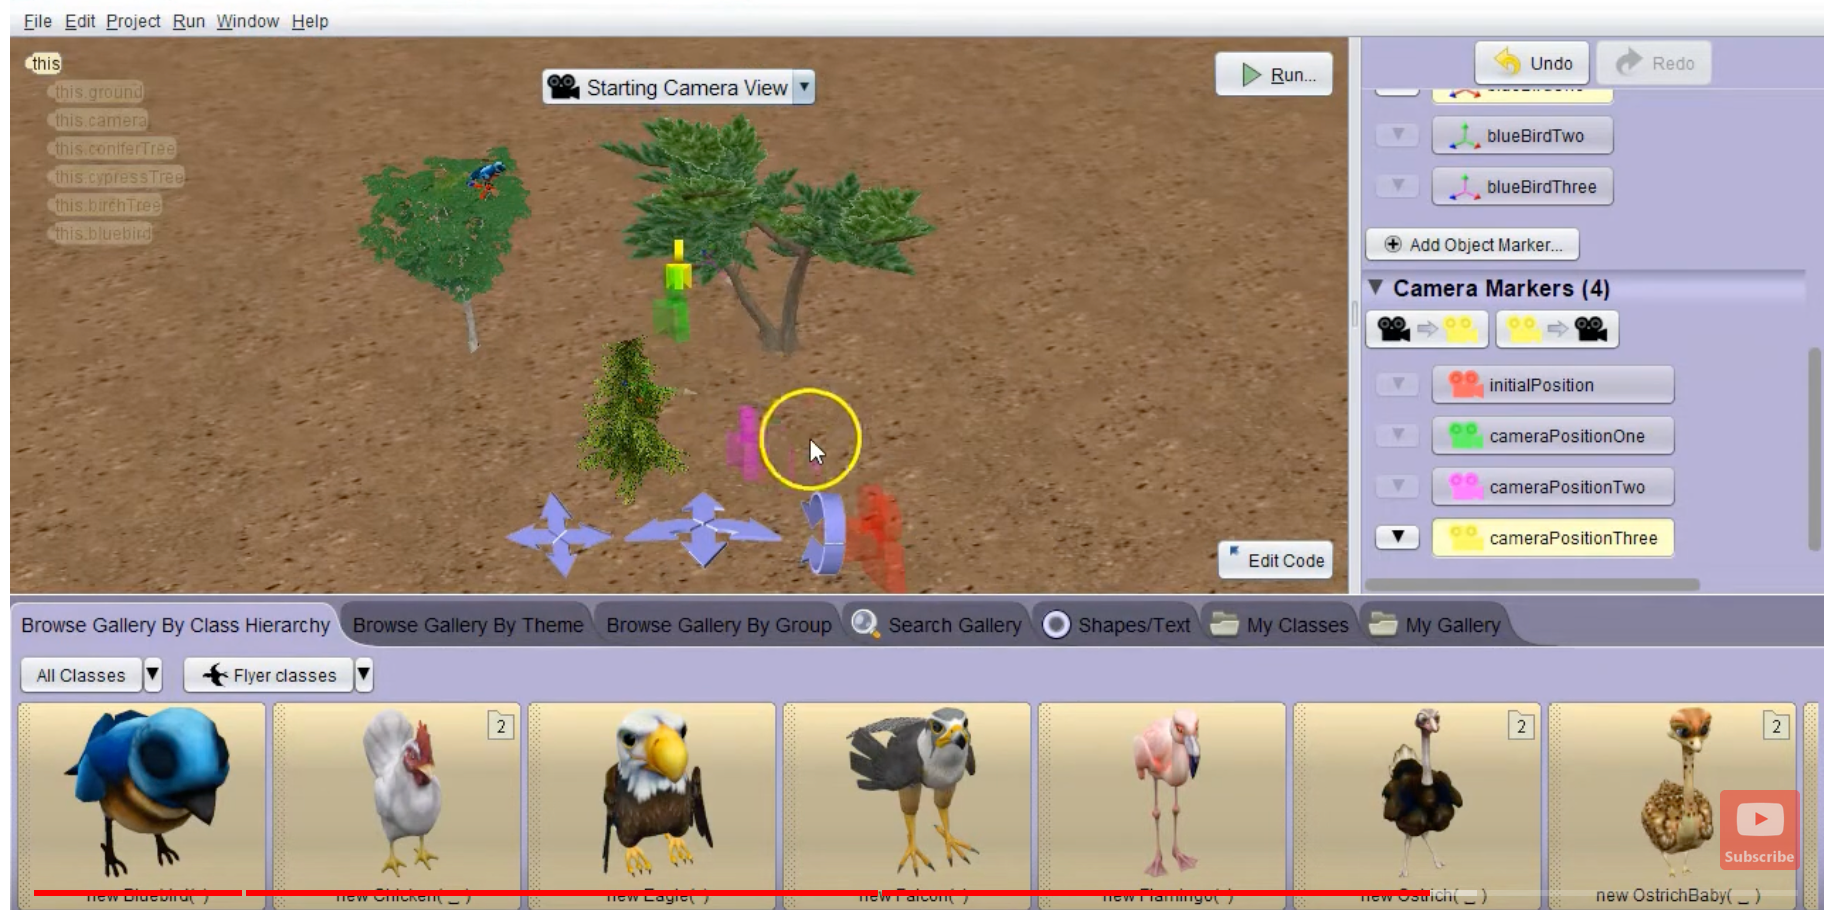
Object and Camera Markers
Alice allows to set Object and Camera Markers. Both type of markers allow you to fix positions on the scene that you can use to move objects to.
The camera marker allows to you to define camera positions, including orientation/viewing angle. You can save each location with a coloured marker and a name for use in your code. The videos Camera Markers and Camera and Object Markers show you in detail how to fix and use the camera markers. The block <this.camera> moveAndOrientTo <this.aDefinedCameraPosition> is the standard block to move the camera in your program.
Object markers are similar, they allow you to define and save a marker for a location on you scene. This is useful if you want to move an object to a well defined position at another object, for example the top of a stone. You can move without object marker one object to the stone, but this will result in your object to be in the middle of the stone. You need an object marker to pinpoint the top of the stone or any other detailed location, then you can move there. The video here Bill Barnum: Alice 3 Tutorial - #05 - Object Markers And Camera Markers describes a scenario with both camera and object markers and how to code them for a short animation.
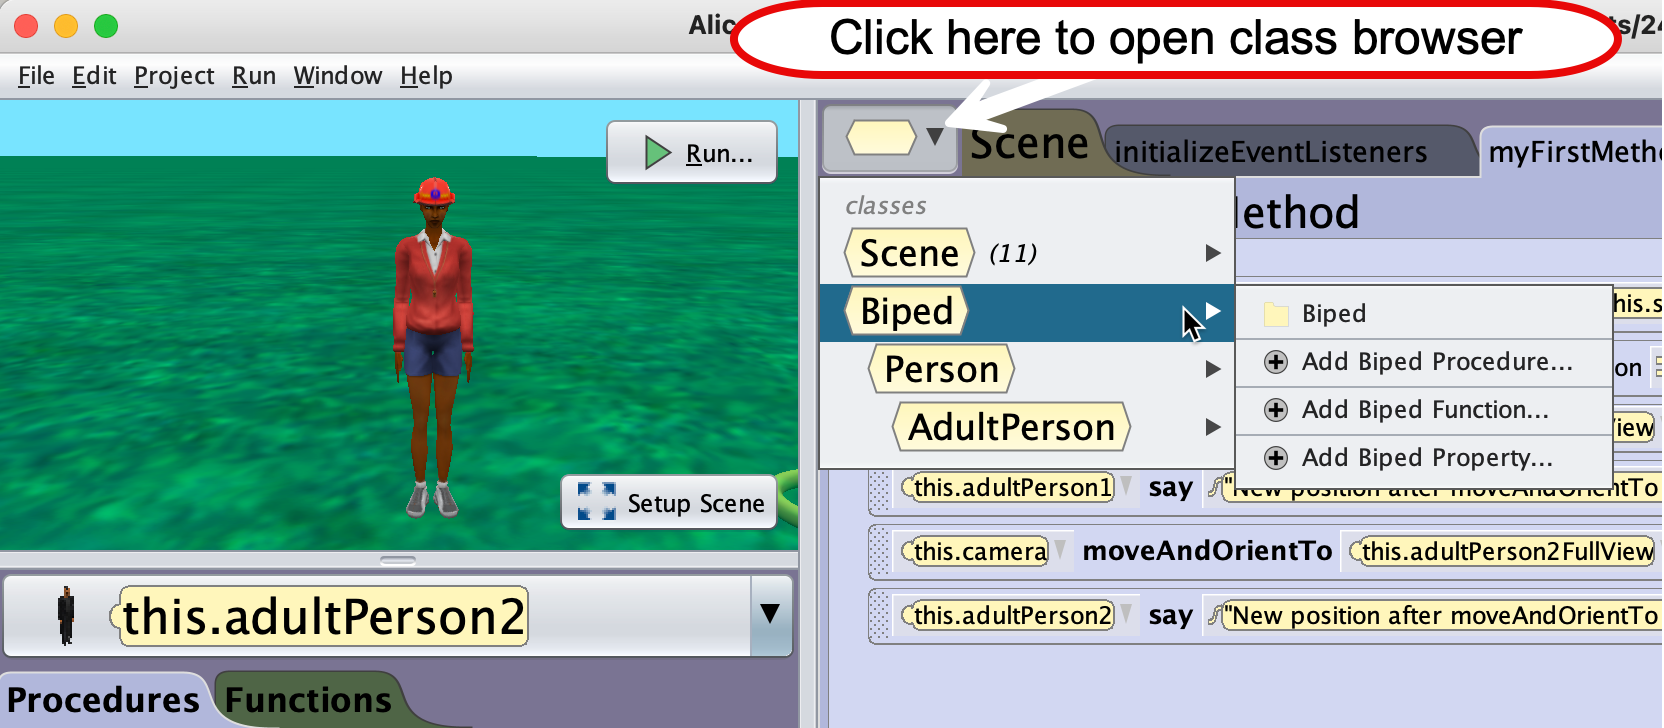
Walking
The three code snippets below can be used to make a biped walk. In order to be able to use the methods not only for the tiger, but for all bipeds, we are defining two procedures in class Biped. One way to create those proecedures is by opening the object tree browser, selecting the Biped class and then clicking on New Procedure. The screenshot shows you how to access the part of the code editor that allows you to create and edit procedures and functions.
The whole process is described in an older tutorial here, the method walk in that post is slightly different, the method shown below is simpler.
You will need to create two procedures, firstStep and walk.
firstStep brings the biped from the standing position to a walking position.
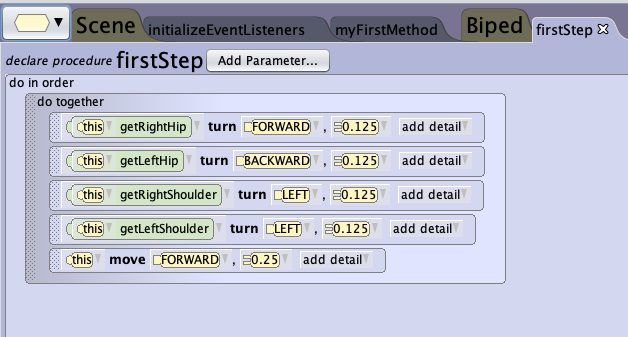
walk consists on two halfsteps, so the biped finishes in the same position it started.
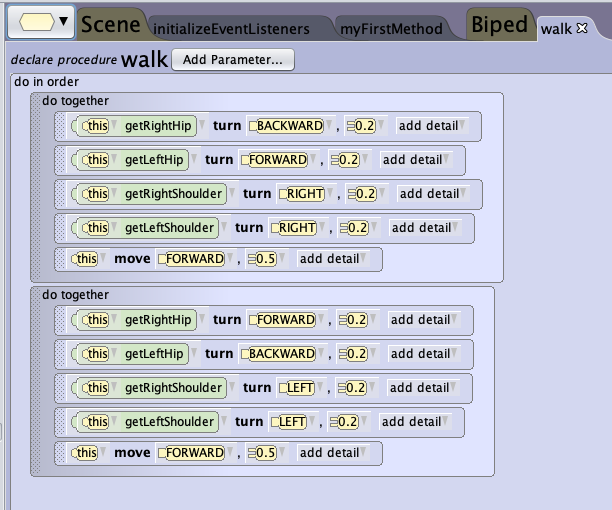
In order for the biped to stand properly after walking, we use the built-in procedure straigtenOutJoints.
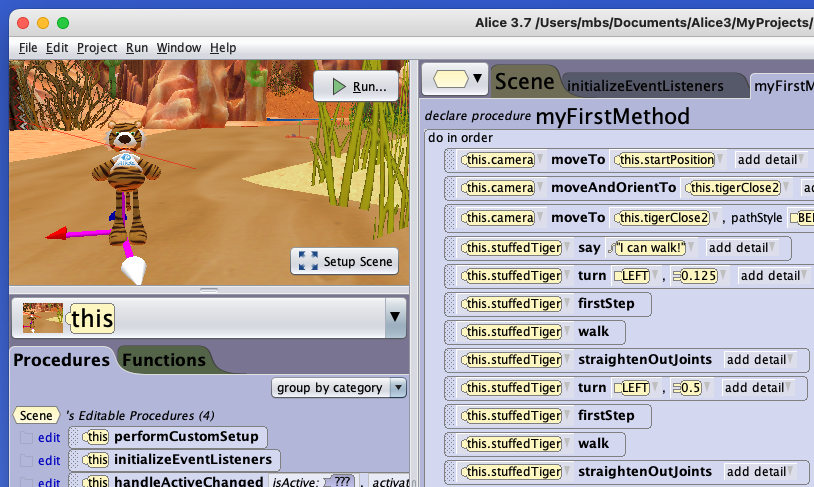
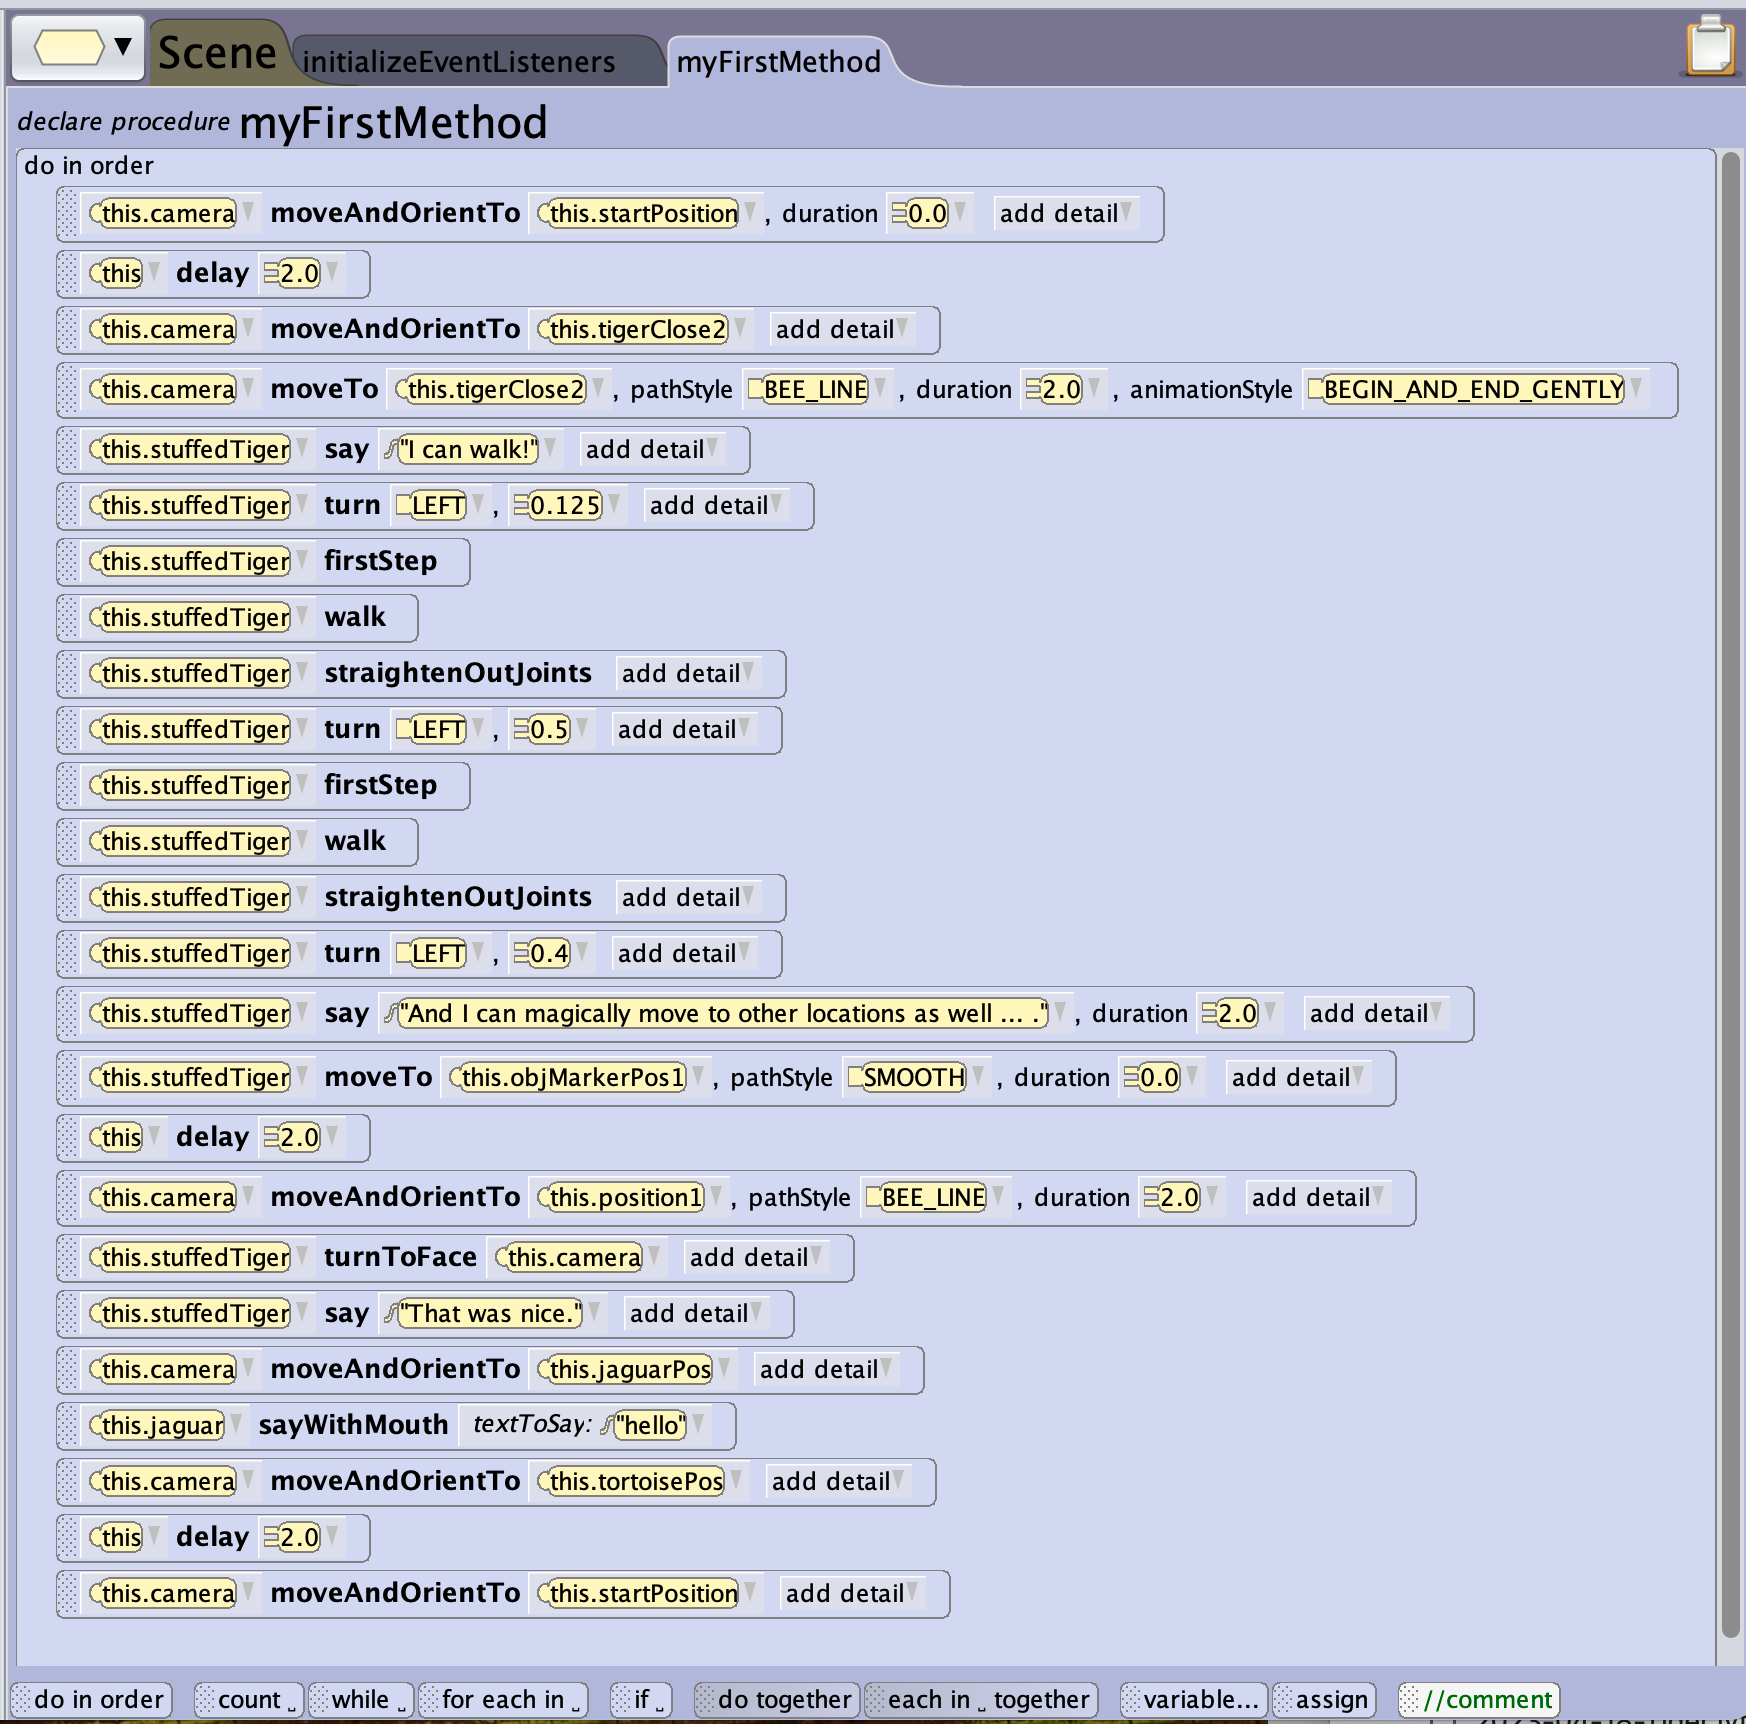
The full tiger project
These three methods and some more to show the use of camera and object markers are used inside the procedure myFirstMethod. You can also download the project from the repository , it’s name is 240506_Tiger3.a3p. Download the program, remix it and make it your own.
 .
.
The video at the beginning of this post is the full animation.
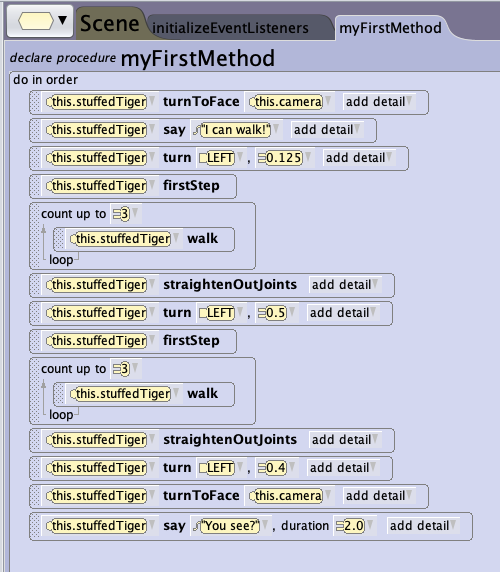
The walking algorithm used here is very basic, but this is on purpose as it makes coding faster. The code snippet below places the walk method inside a count loop, so the tiger takes 1 + 6 half steps, forth and back.
There are more realistic procedures for walking available here, you may have a look ahead of next session if you like.
Furthermore, there is a very comprehensive tutorial on sub-parts/joint movements on the Alice 3 website, here is the link to the page.
How to Add und Use Audio Files
Everything on how to get audio files into Alice and use them, you can find on the Alice website.
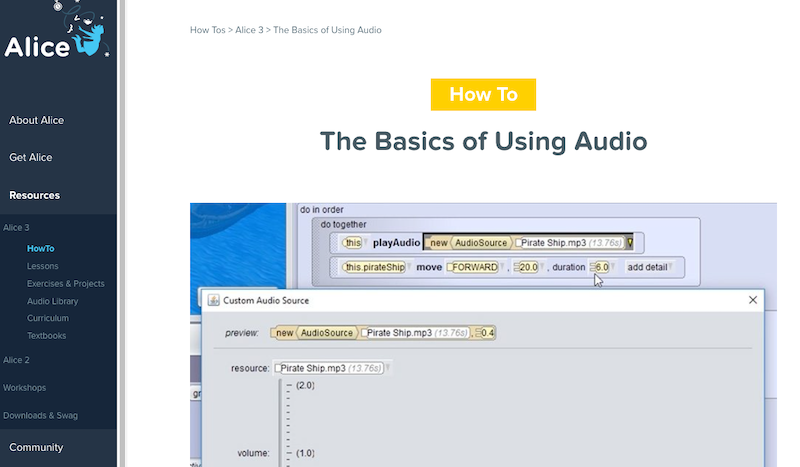
This post describes how to upload and use audio clips inside your projects. The Alice website contains an assortment of audio clips that you can download and then use in your projects. You find the folders with the content here.
Voice recordings make your animation more lively and interesting, sound effects like thunder help to enforce the atmosphere you want to create.