Get Started with Alice 3 - Part 3 - Copy & Paste, Import & Export Procedures, More Animation, Vehicles
Learning Objectives:
- Use of the Clipboard and other commands to facilitate the coding process
- Import (and Export) classes and parts thereof into another class
- How to animate a quadruped
- How to add and use audio files
Some Explanations
Use of the Clipboard, Duplicate blocks, Intelligent Undo
The normal copy and paste commands from other applications do not work with Alice 3, the graphical code blocks need to be manipulated in a different manner.
Alice has a Clipboard, you can see it in the top right corner. You can drag and drop code blocks there. This works for single code blocks, but you can also drag multiple code blocks that are part of one conditional (if then else), loop (while) or structure (do together). You cannot select several blocks together and drag them on the Clipbard in one move.
By default, the selected blogs are removed (similar to Cut in a normal editor) when you move them to the Clipboard. When you press the option key on your keyboard while selecting them, they remain on the Code editor. You can add more than one code block to the Clipboard, one after the other.
When you remove (Paste) the blocks to your destination, they are by default deleted from the Clipboard. If you want to keep them there, press the option key while dragging them out of the Clipboard. When you have moved several blocks of code on the Clipboard, the oldest will be the last one you can retrieve (Stack).
If you want to duplicate a block in the editor, just just press the option key, click the item you want to duplicate and then drag it to its destination. Then you can release the option key.
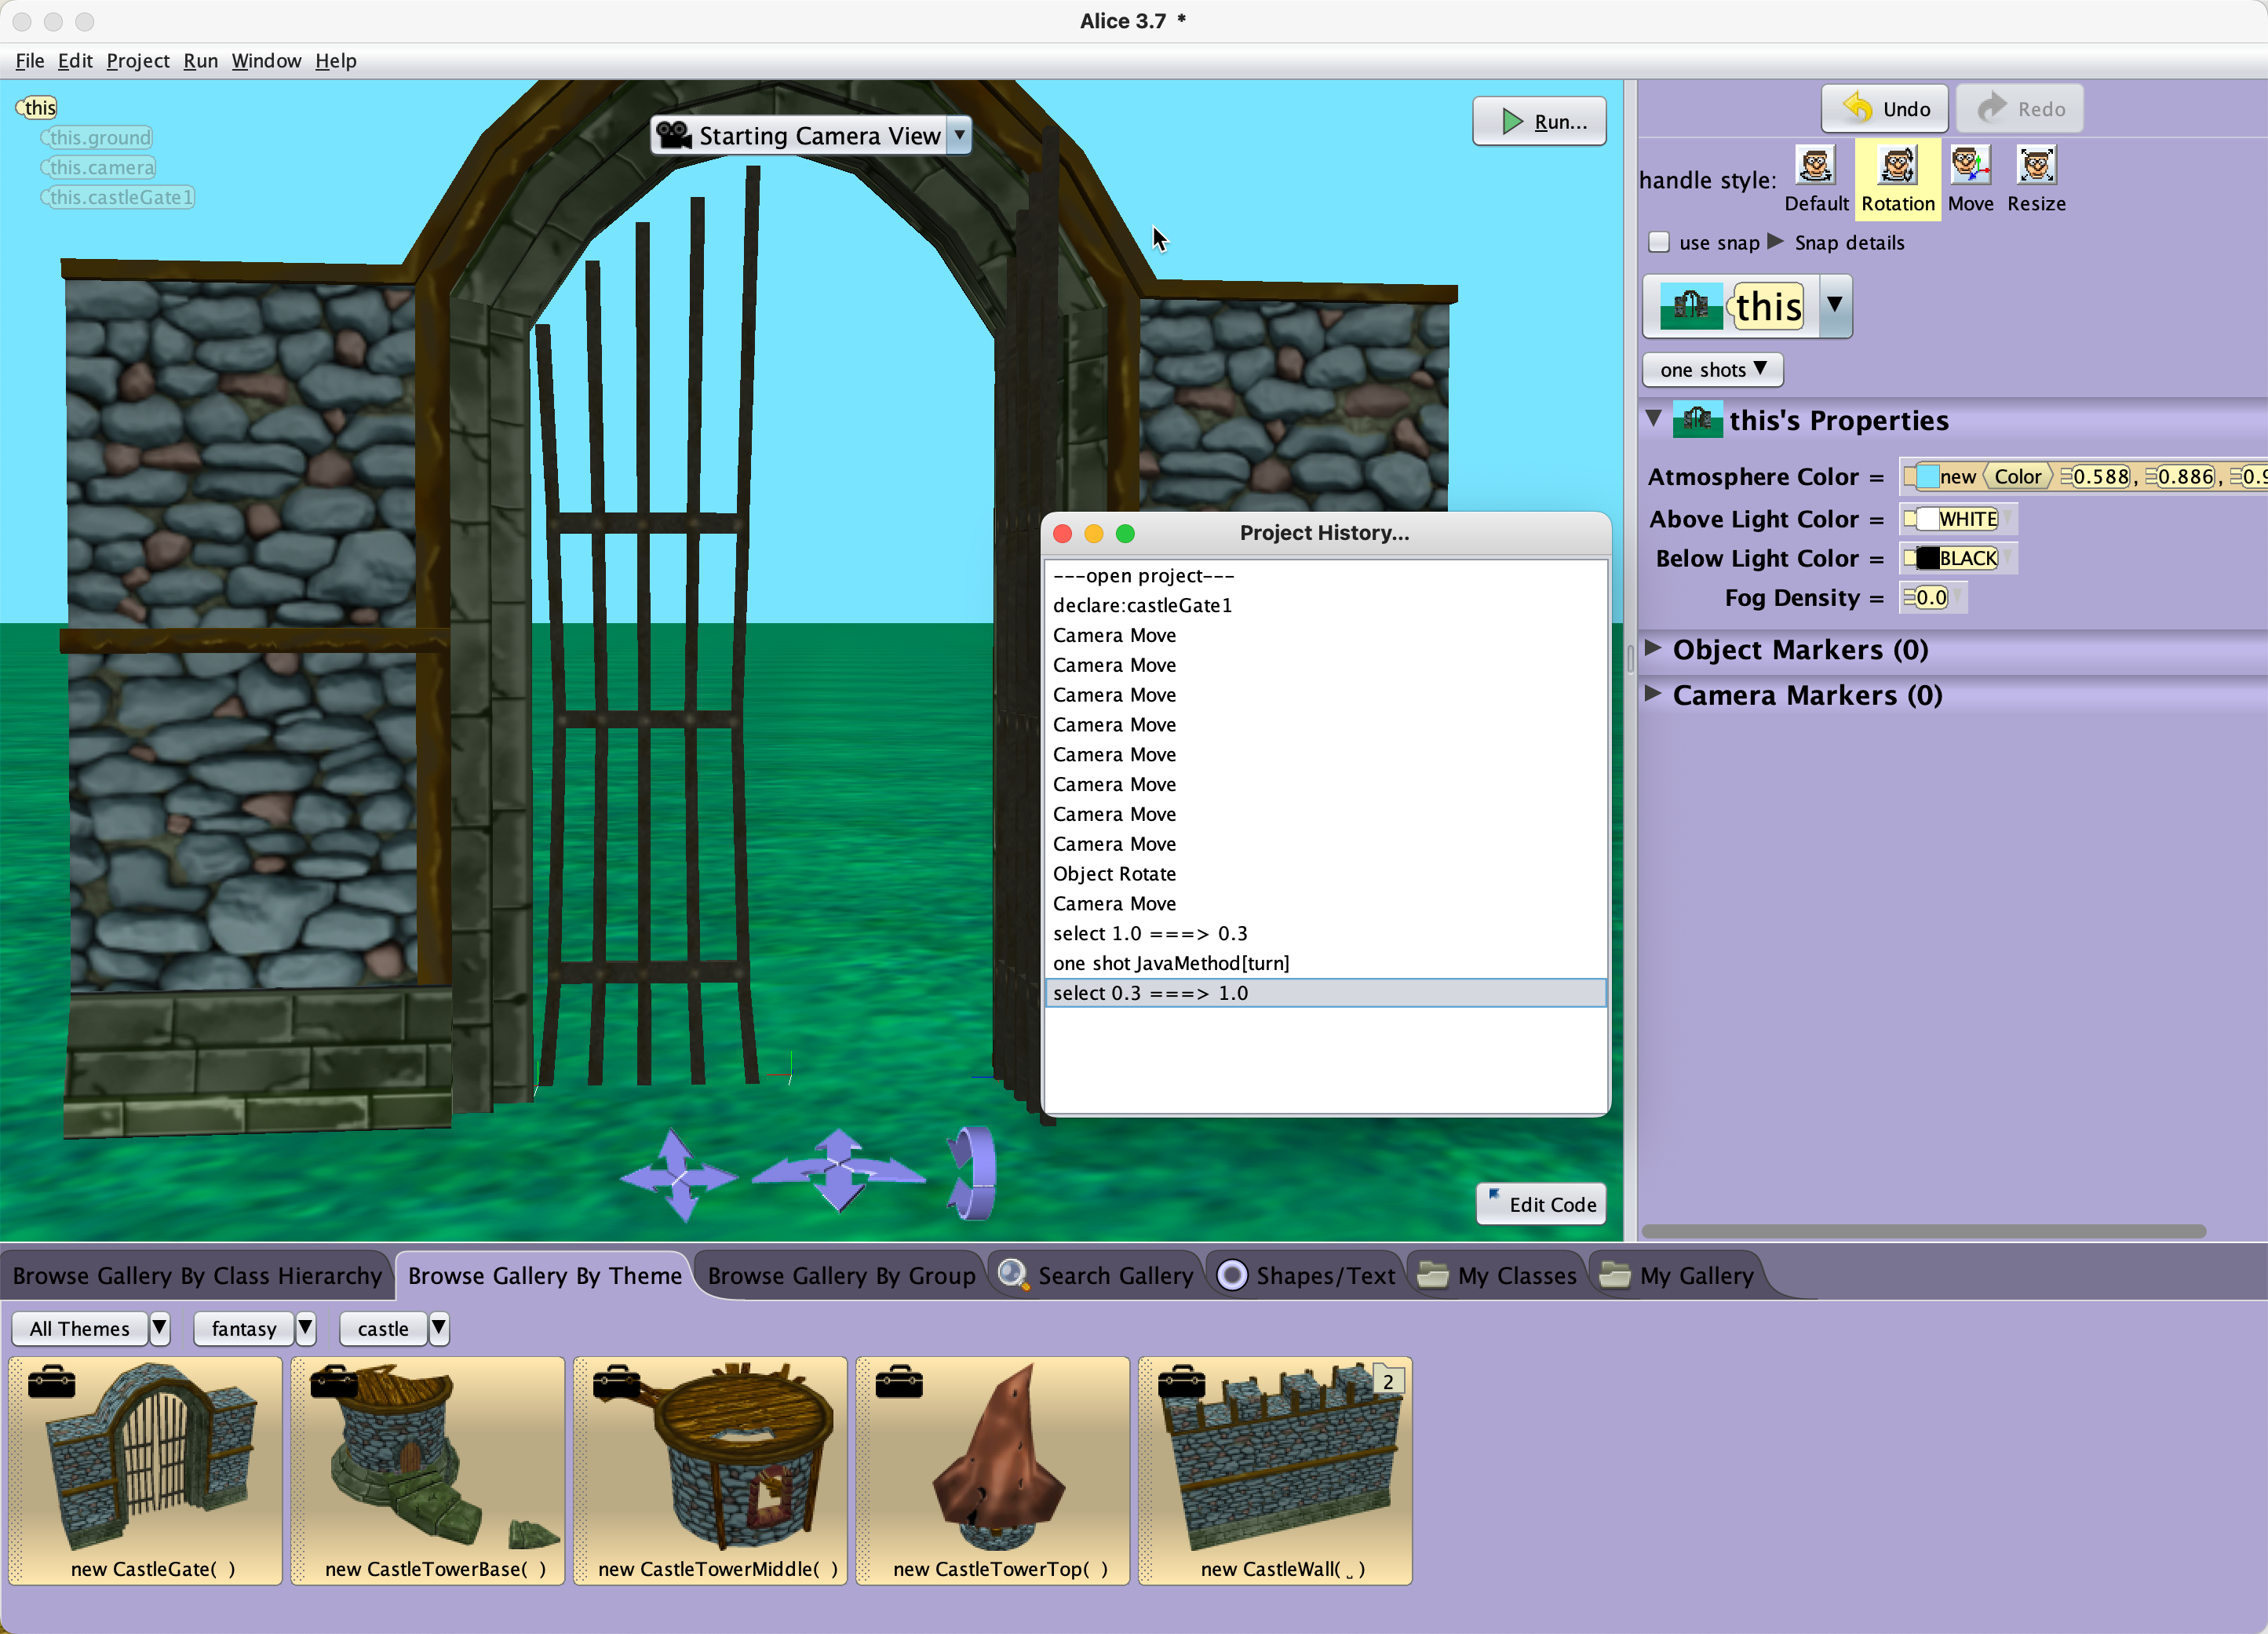
Besides the classic Clipboard, Alice also provides under Project/Project History a step-by-step history of each change you made since you opened the project. You can select a step and you will see in the code editor a roll back to the situation at this point. If you are lost and the project is not any more doing what you want it to do, this may be your saviour. Select the step you are still feeling fine with, undo all changes since, and start anew.
Import (and Export) classes
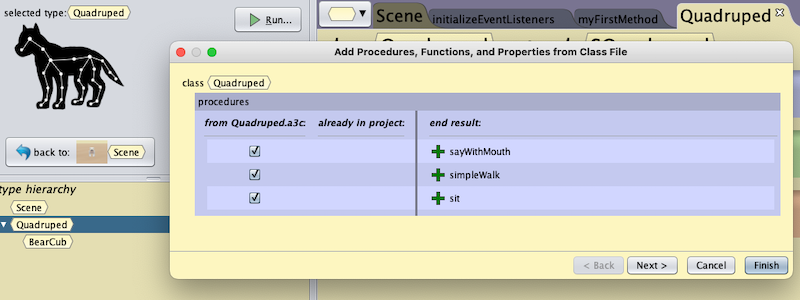
Alice allows you to import classes into your project. Actually when importing into a class of the same name, you get a panel showing the new procedures, you can then choose which ones to reuse in your class.
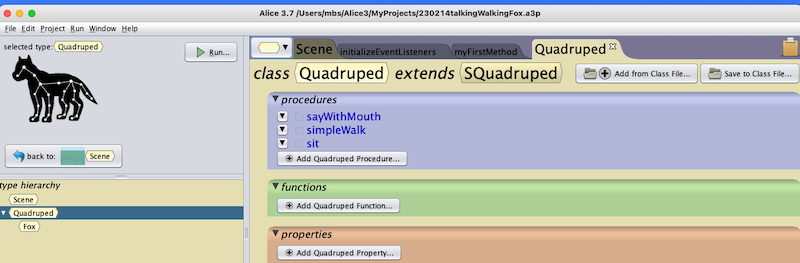
New Procedures for Quadrupeds
The following video clip shows you a sample project using three new procedures to animate a quadruped.
The code of the main function is straight forward, it uses the three procedures and changes the camera angle.

In order to get the procedures, please import the class Quadrupeds.a3c by downloading the zipped file with the repository Alice3Coding, and then clicking on the Import button inside the Quadruped class.
In the file you get three new procedures highlighted:
sayWithMouth
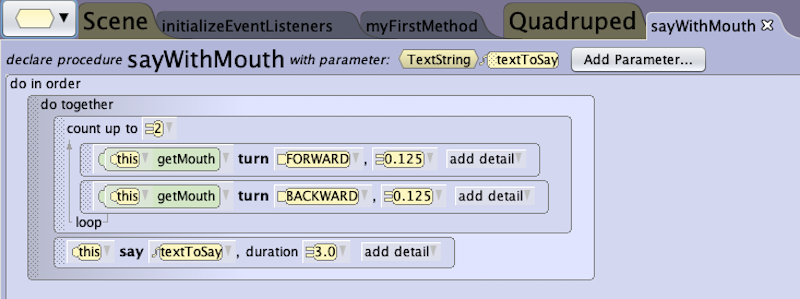
The procedure animates the mouth while speaking. The procedure introduces a new feature, a parameter. In this procedure, you assign the parameter the text you want to appear in the speech bubble.
simpleWalk
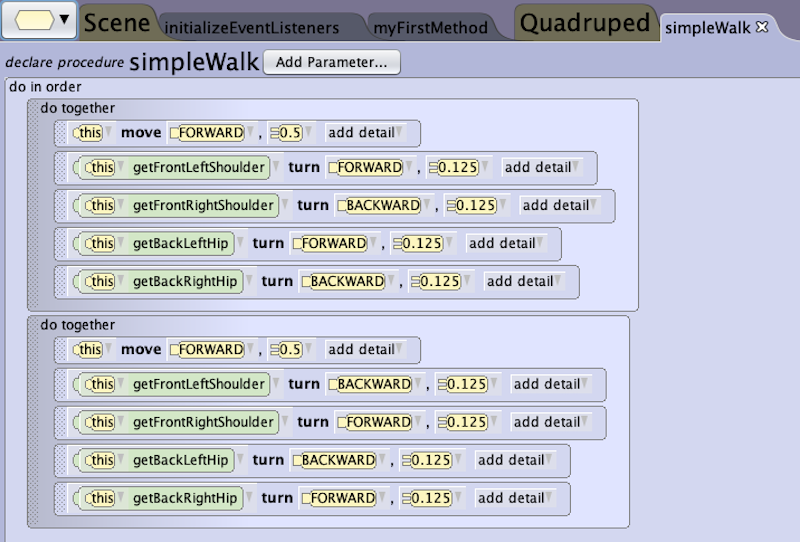
This procedure coordinates the movements of the four legs to make it appear as the animal is walking. The movement is a simplification, but it is a good starting point.
sit
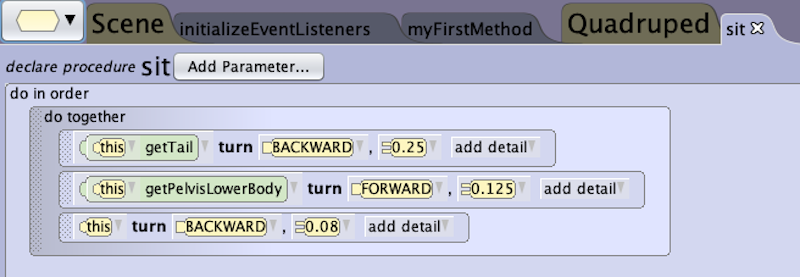
This procedure lets the animal sit down, also taking care of the tail.
Figuring out subpart movements
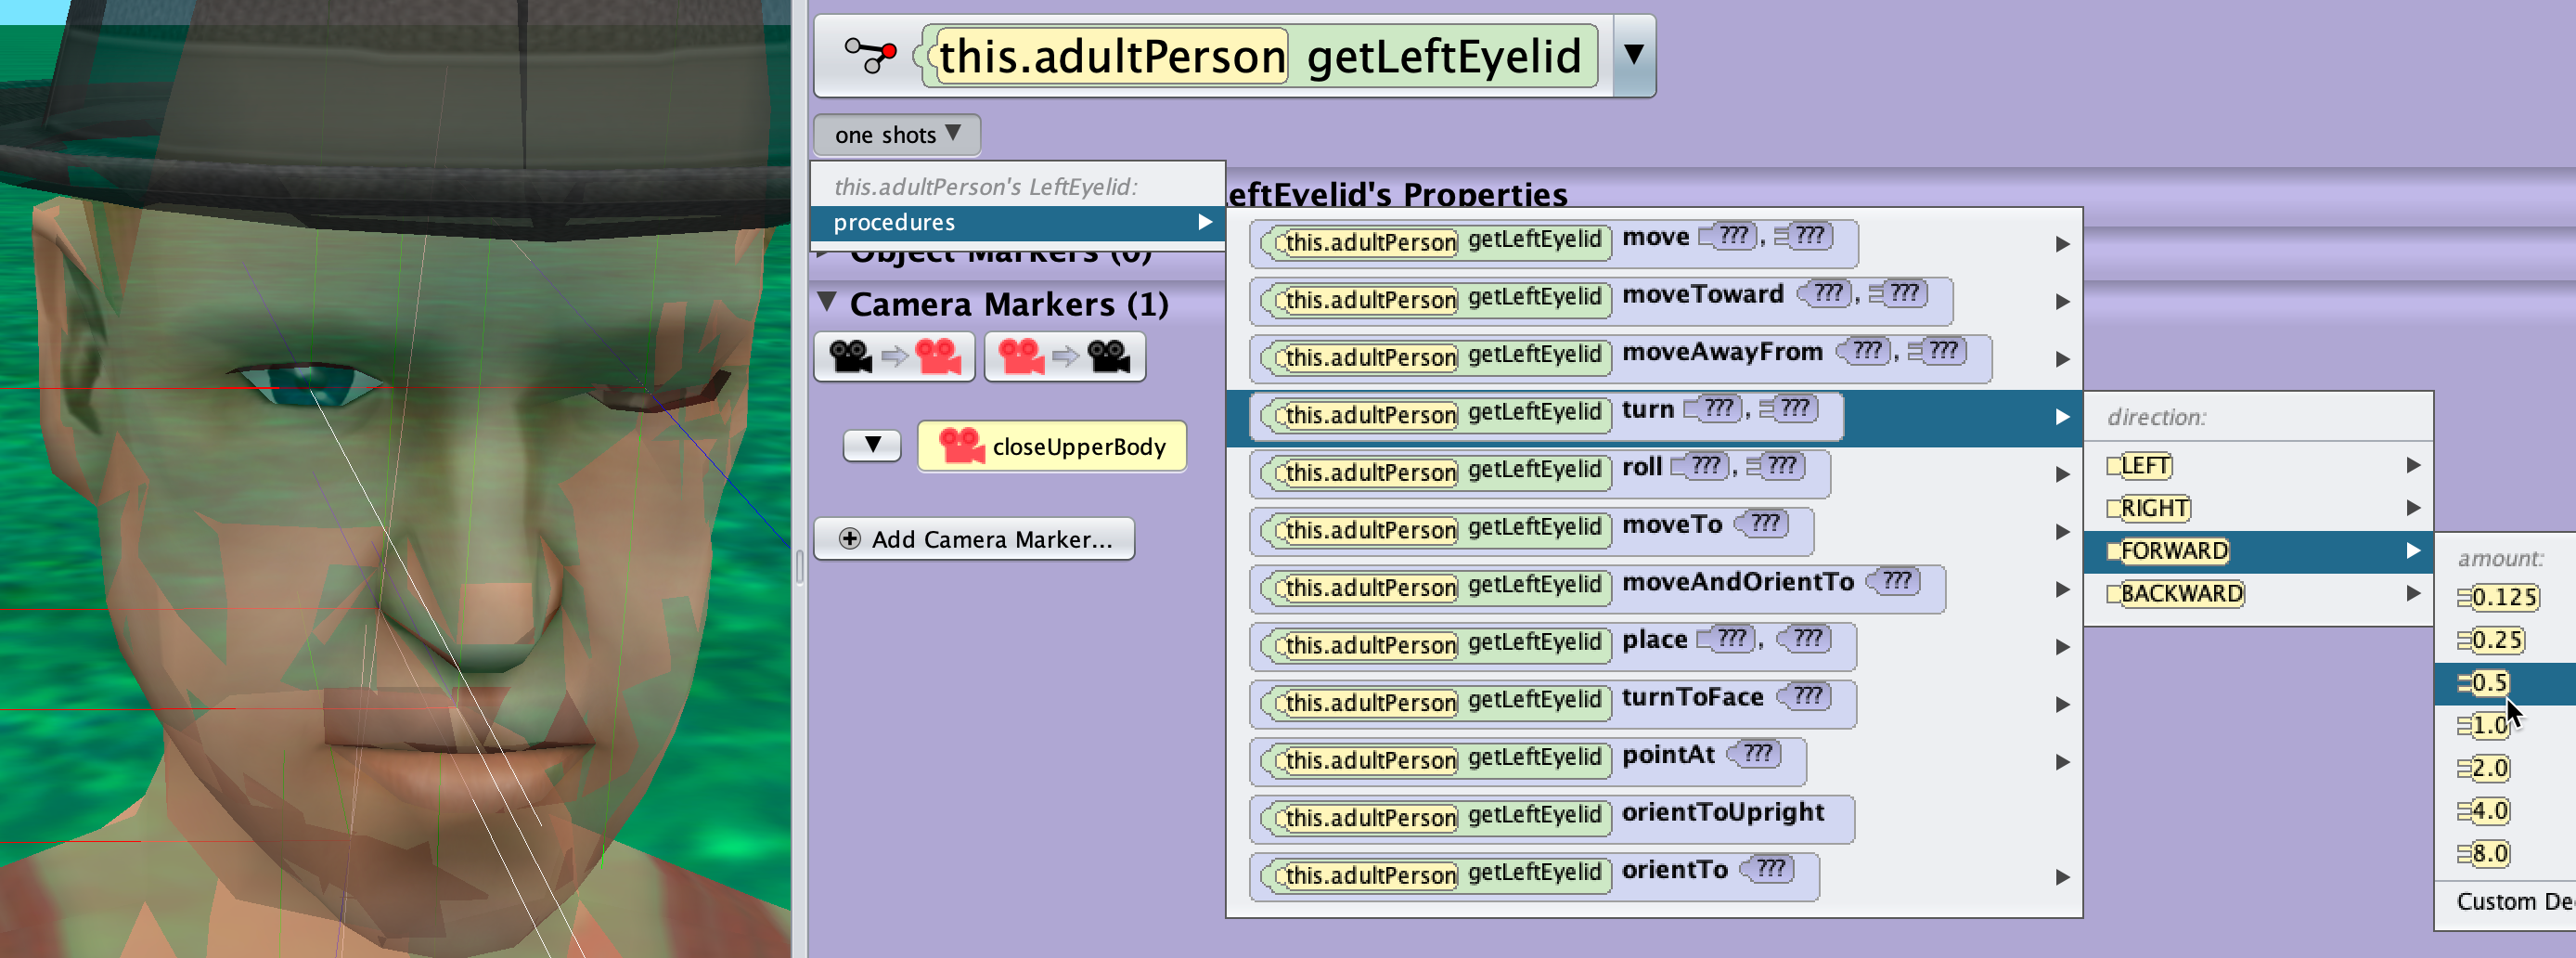
Figuring out how the subparts of an object are moving, takes some time. It is a good approch to select an object in the Scene View, choose an opacity of 0.3 and then click the box Show Joints. You will see many small coloured axes depicting all joints available.
Next, you select a subpart of your object and then when use one shots with different movement procedures, normally turning and rolling, using different directions and values to figure out how things can be controlled.
The colours of the axis have the following meaning:
- white -> forward
- blue -> backward
- red -> right
- green -> up
turns change the sense of forward, rolls will roll the object around the white axis. Moves are normally not recommendable, they stretch/squeeze the attached subparts.
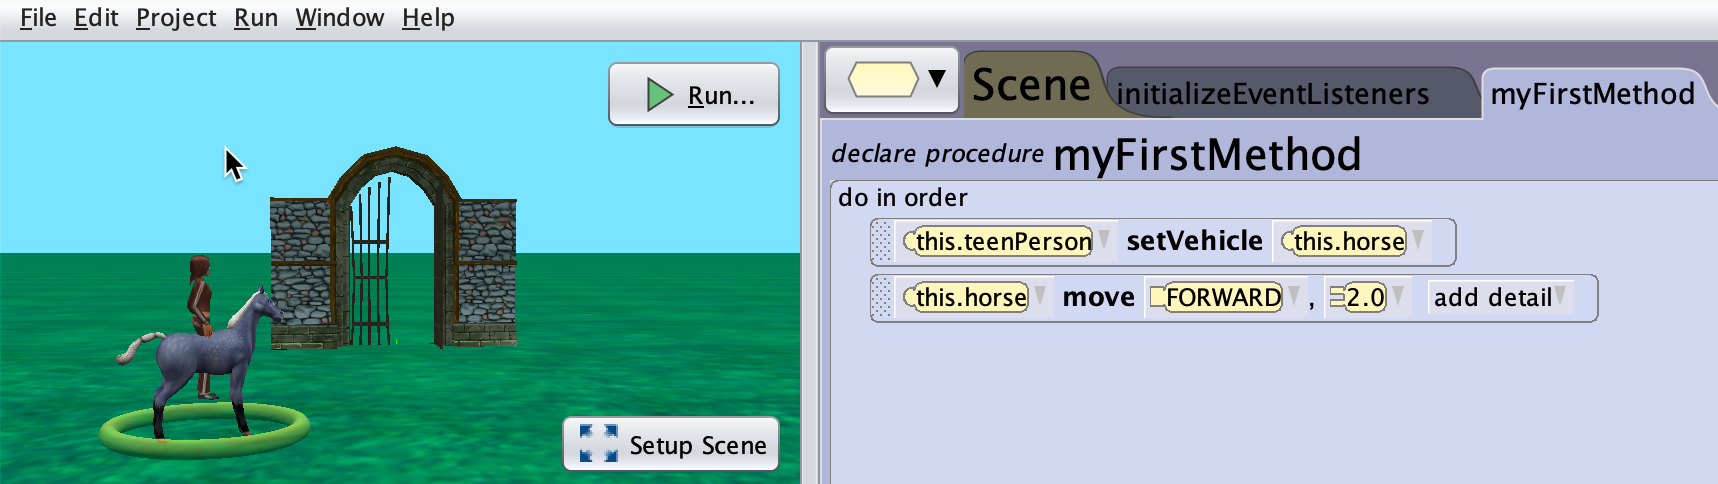
Vehicle function
Somtimes you want to move two objects together, using one method only. An example is the rider on a horse, in Alice these two are distinctive objects. You can do link them by making the horse the vehicle of the rider. The screenshot shows how this works. Afterwards, when you move the horse, the rider will be moved together, as one unit.