Get Started with Alice 3 - Part 5 - More About Events
First Person Mode and Collision/Proximity Events
Learning Objectives:
- Understand the basic concepts behind events (revision), get to know more applications
- What is a First Person View, implement it in Alice 3 using camera markers and the vehicle block
- Use key events to swap between the different camera views and get the possiblity to do other things.
- How to use the collision listener with Alice 3
Short Revision on Events, Listeners, Triggers, and Execution of Code
Listeners allow you to trigger the execution of code. Whenever a predefined event on your computer is registered by a listener method, the code associated with that listener is run. What type of events are the listeners looking for? This can be mouse clicks, the key c is pressed, an object inside your game comes into proximity of another object, and many more. When such an event occurs, the execution of the code inside the particular listening method will be triggered.
So far, we have used the addObjectMoverFor ... to steer our rover. Furthermore, we have implemented a proximity listener to detect when the rover is within 1 meter distance to some predefined objects on the Mars surface. Check again in part 4 of the series. We just continue here where we left off with the Mars Rover Game before.
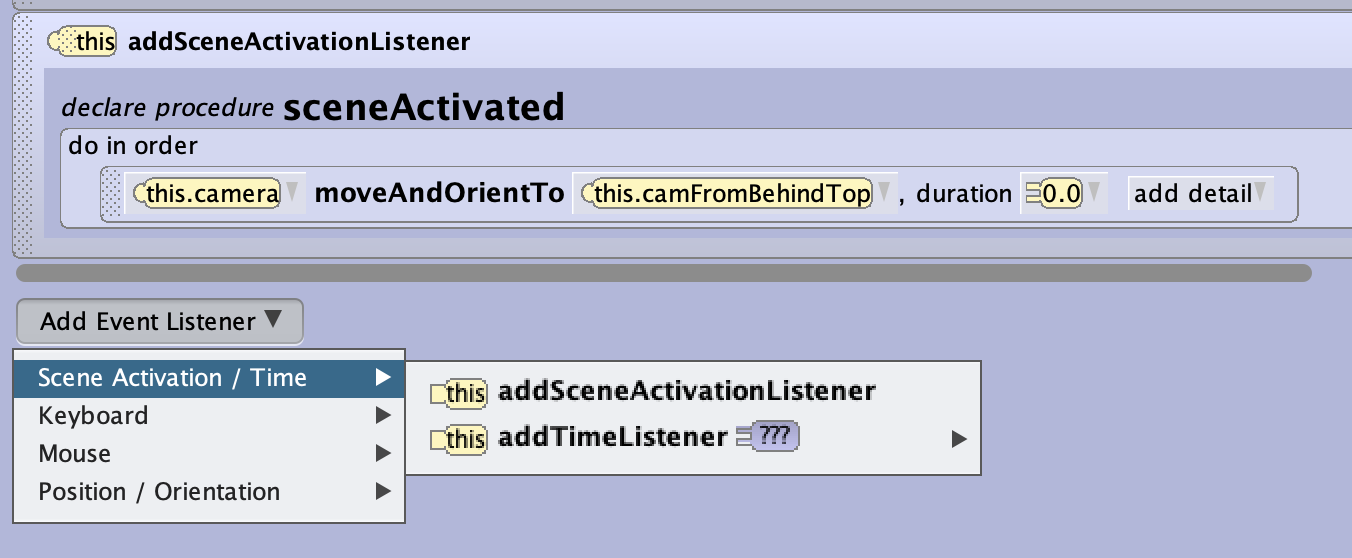
How to execute code before the start or after a defined time
Another classs of events allows us to run code jsut at the beginning of the program or after a certain amount of time. Whenever you click on the Run button, this triggers the addSceneActivationListener to execute some code. The following example makes sure that the camera is always at the starting position when you start the game.
First Person Mode
Many games are run in the first person mode, the user sees things through the eyes of the acting model. We will continue to expand our small Mars Rover Game we have developed in part 4 of this series. As before, we are dealing with listeners, so we will add the following code inside the tab initializeEventListeners by creating a new listener first and then adding the logic.
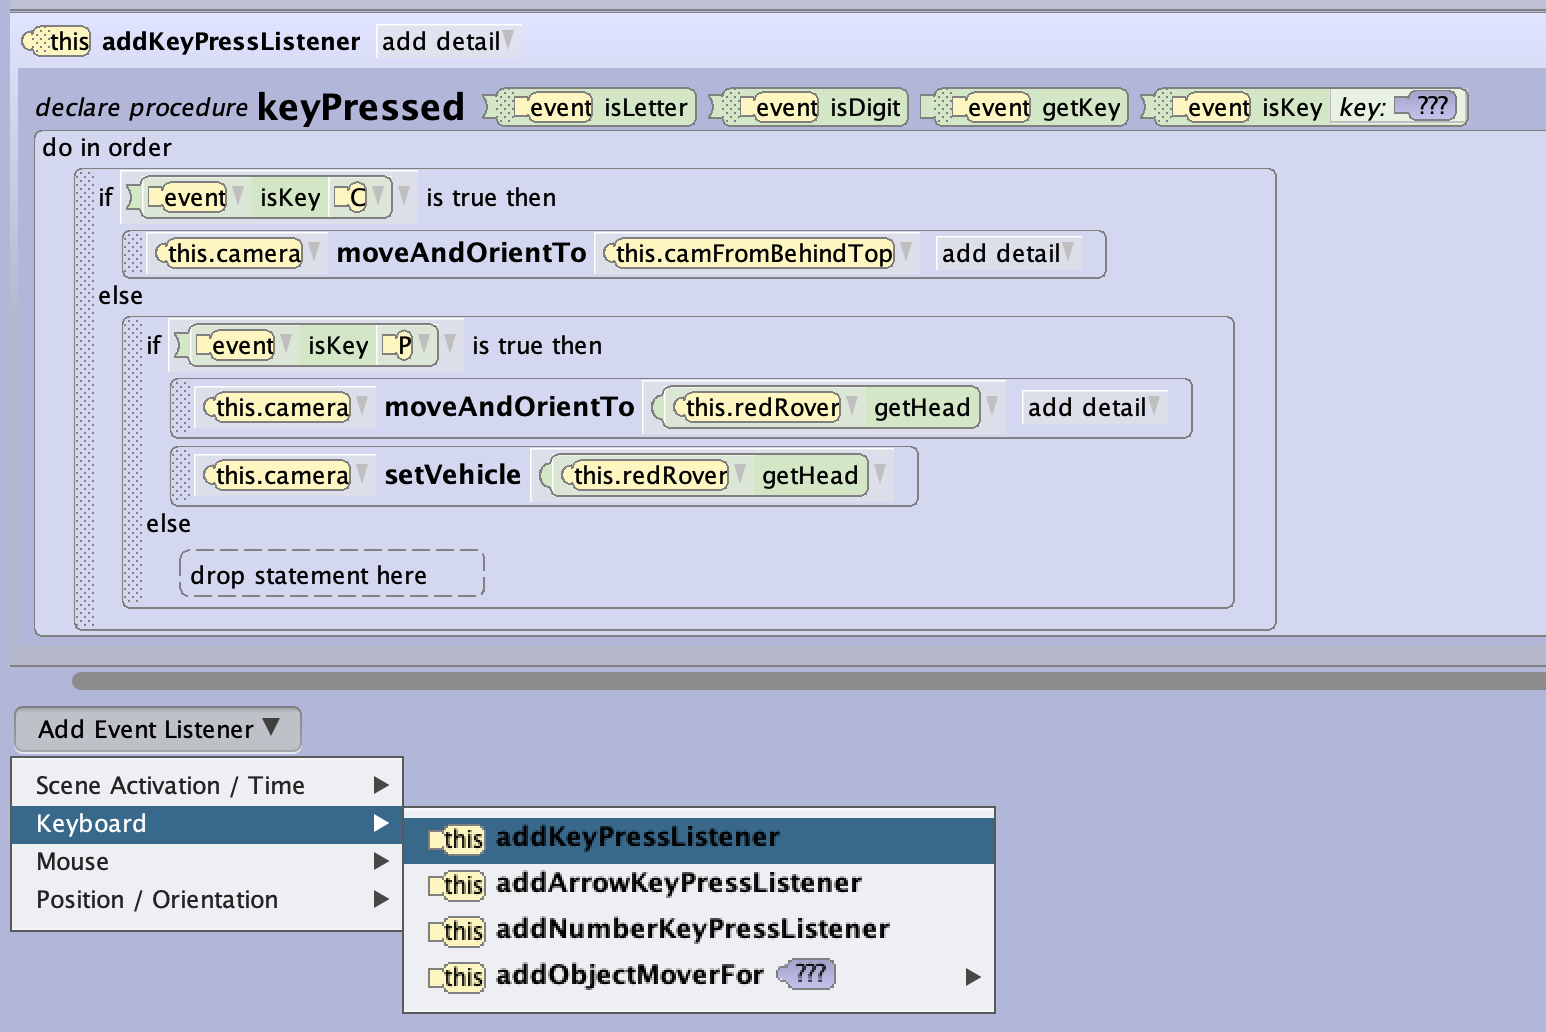
This simple game has one player, that is our Mars rover. We have two views for the camera that can be selected by pressing keys.
CStart viewPFirst Person View
If you decide to use more keys to add more features, make sure that you nest the if statements into each other as it is done here for the two keys.
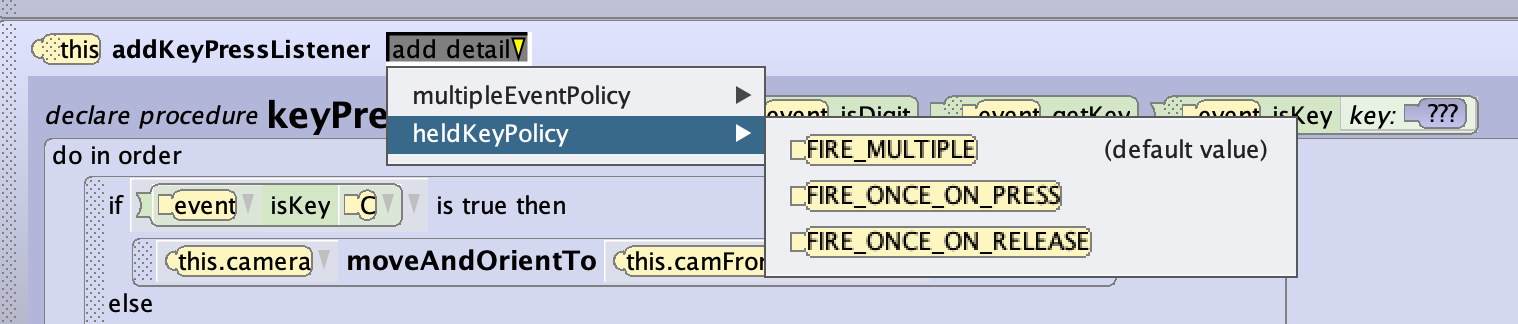
Details for Triggering Keyboard Events
Above the procedure for the keyboardListener there is an option box with add detail that allows you to configure the listener’s response if you press your key(s) many times or longer.
The options under multipleEventPolicies give you choices on how the triggered code should be executed. You have the options of
- Enqueue -> The events are queued and executed one after the other until the queue is empty.
- Ignore -> only one event once (default)
- Combine -> the program will try to execute all at the same time.
The options under heldKeyPolicy cover the event handling from the point of view of the trigger. The default option FIRE_MULTIPLE will keep sending out triggers as long as you keep the key pressed. This is the type of behaviour you would use for a steady movement.
These two settings are influencing each other, so for the default setting all events following the first are ignored due to multiple event setting, but the chosen key policy you allows a steady flow of triggers, as long as you keep the key pressed. Too many triggers and processing in the event loops can deteriorate the performance, and your game may react sluggish.
Collision Detection
Collision detection is set up very similar to proximity detection. You define it again on the tab initializeEventListeners. The set up process is similar to that of the proximity listener, please refer to the previous post.
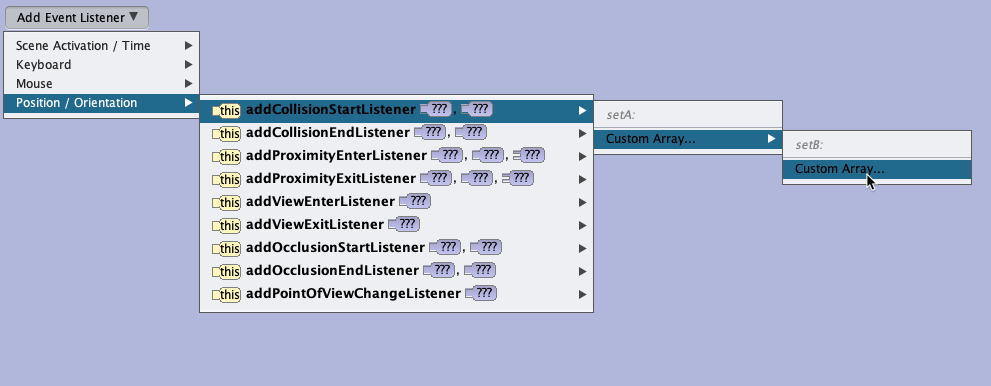
You need to declare on two panels which object(s) should trigger an event in case they are touching each other. Then you will need to code whatever action you want to be taken when the collision has been reported by the listener. On the screenshot, the first panel only contains the model alf, the player, the other panel contains a list of trees. While the collision listener will recognise a collision, we still need to program what should happen. In this case, the person should move backwards, avay from the tree.
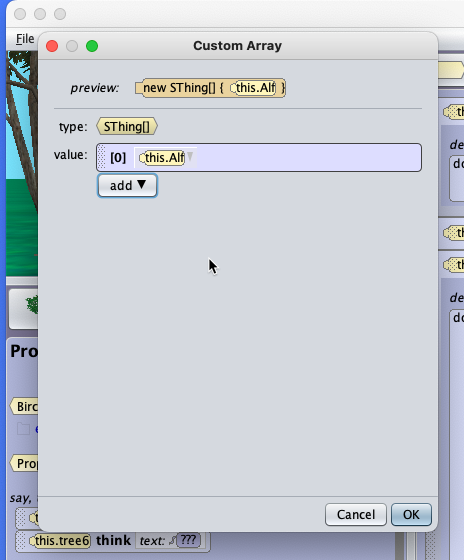
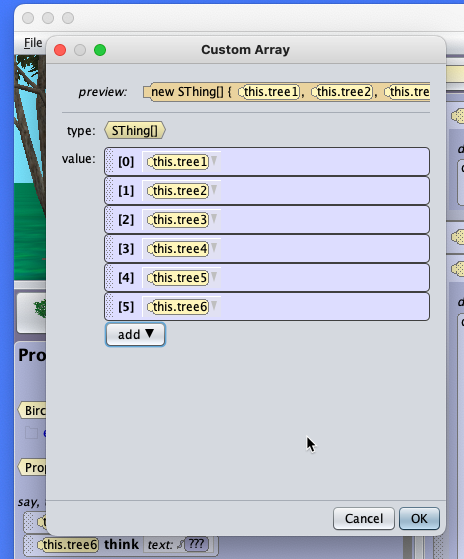
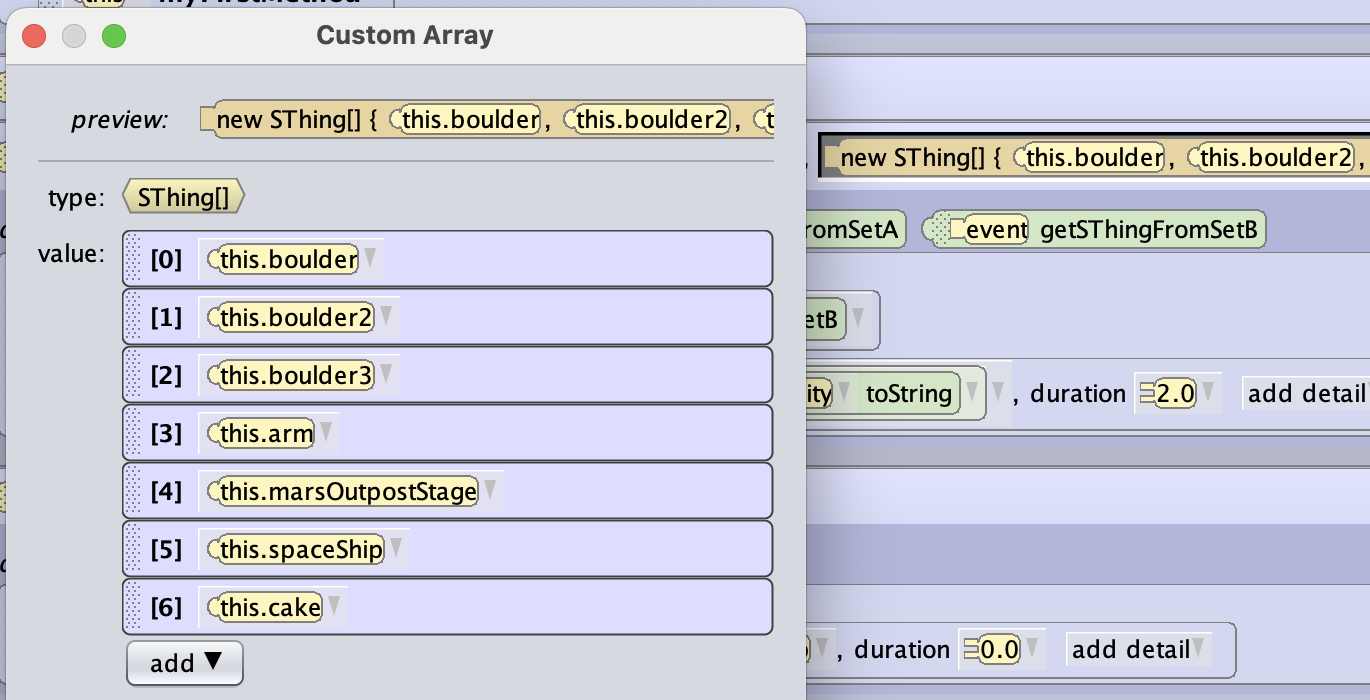
Sometimes you want to add or remove models/objects after you have created the setA and/or setB arrays for proximitiy or collision events. In order to do that, just click on the respective new ObjectName[](...) procedure with the previously chosen objects as parameters, click on Custom Array, and then edit the list of objects/models in the opening panel setA or setB.
Collision events also allow you to set a multipleEventsPolicy with the same parameters as described before at key events. Check above.
The Final Code for the Mars Rover Game
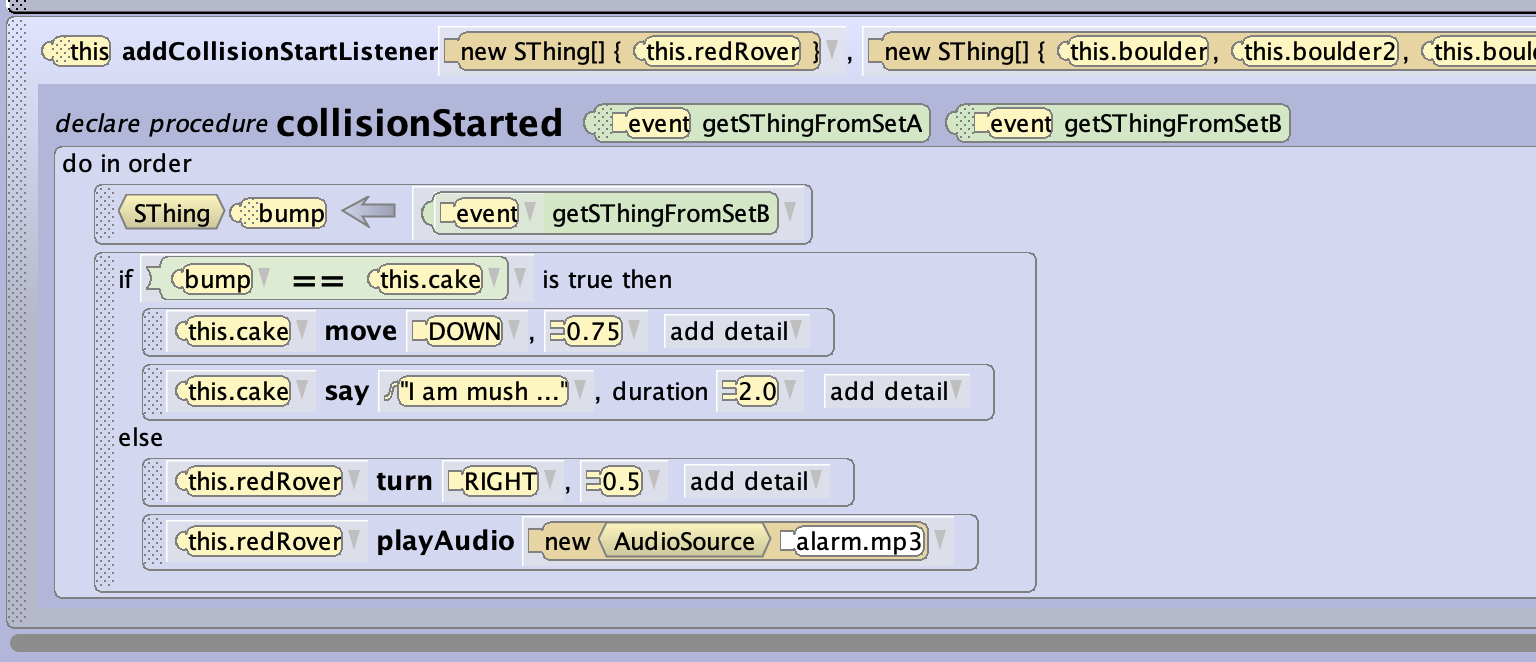
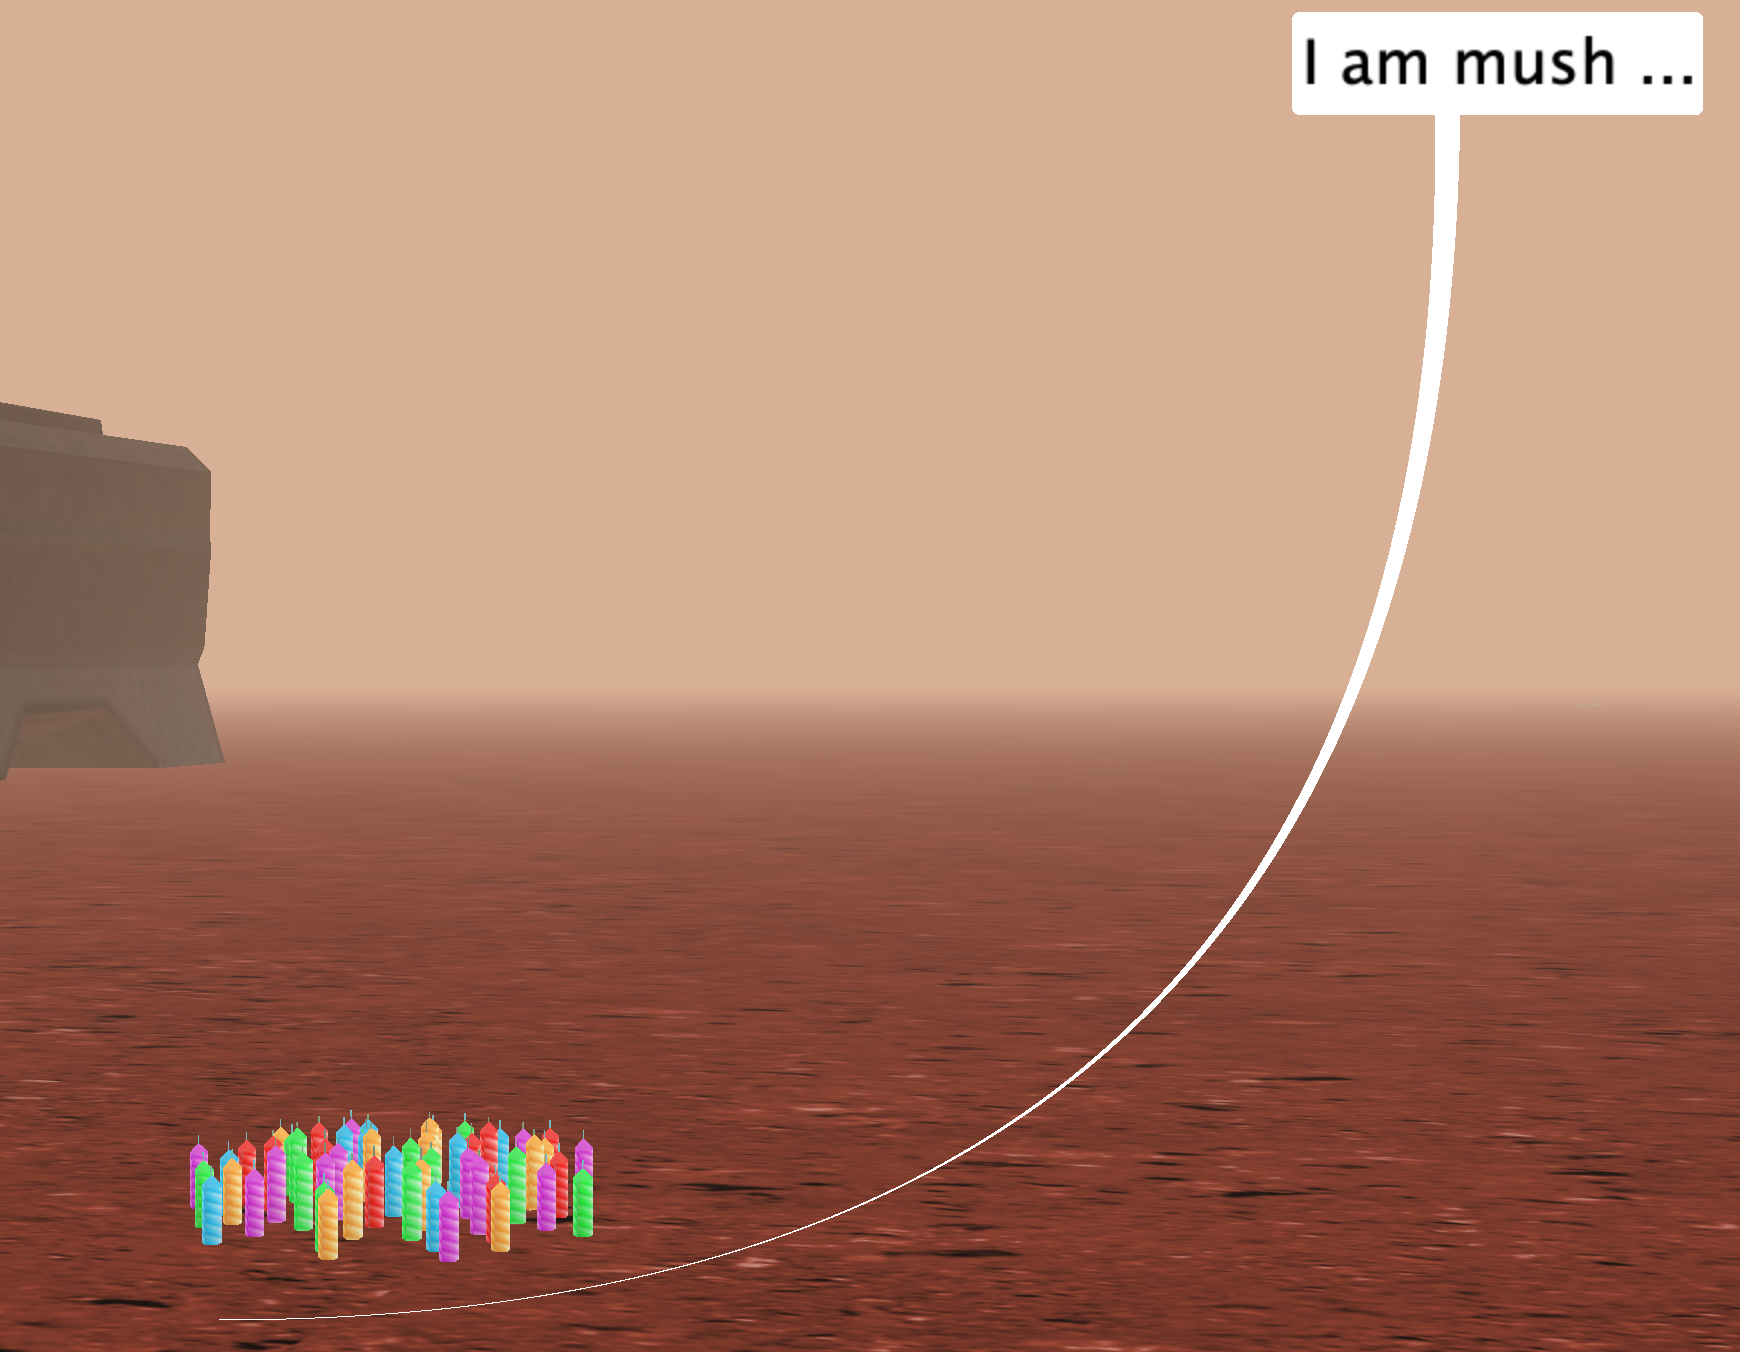
Here is the code for the Mars rover. When the user steers the rover to run over the cake, the later is flattened; when the rover bumps against the other obstacles, there is an alarm sound, and the rover is deflected from the obstacle. Please also notice how variables and assignments are used to identify the cake. Please refer to the previous post for details.
This Mars Rover adventure is only a small project to introduce some core features of Alice 3, feel free to download the game in the repository and add your own ideas. You can download the complete game here.
Timer

A timer is a basic staple being part of most games. In its simplest form it just counts up (increment) or down (decrement) in a fixed interval, typically one second if the game is not too fast paced. So, with a decrementing timer you can create a count-down or just keep track of the time before the game is over.
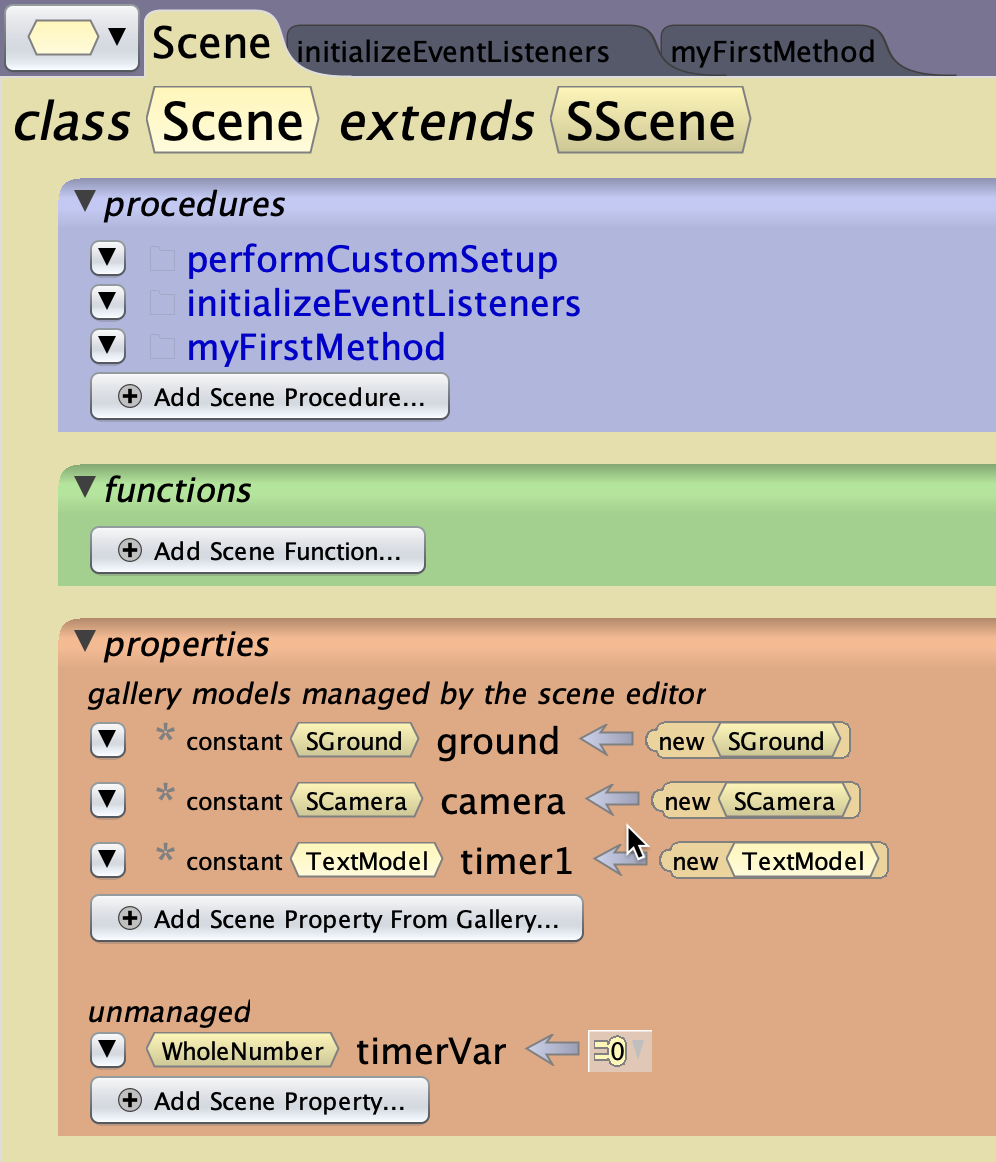
While you can create your own timer (see the videos below) Alice allows you to easily get a timer by declaring one global variable and then use a time listener with a time interval you can choose (in the example below 1.0 seconds). So, with one variable declaration, one listener and two lines of code you get a simple timer counting up.

This basic pattern can be modified and combined with other event listeners to meet you game design’s requirements.
References
- This video demonstrates and explains a timer with start and stop triggered by collision/proximity events How to Create a Timer in Alice 3_Hannah
- This is a more detailed introduction with several examples Timer Examples in Alice 3.1
- Extract from video, timer Alice 3 Part 10 - Game Design